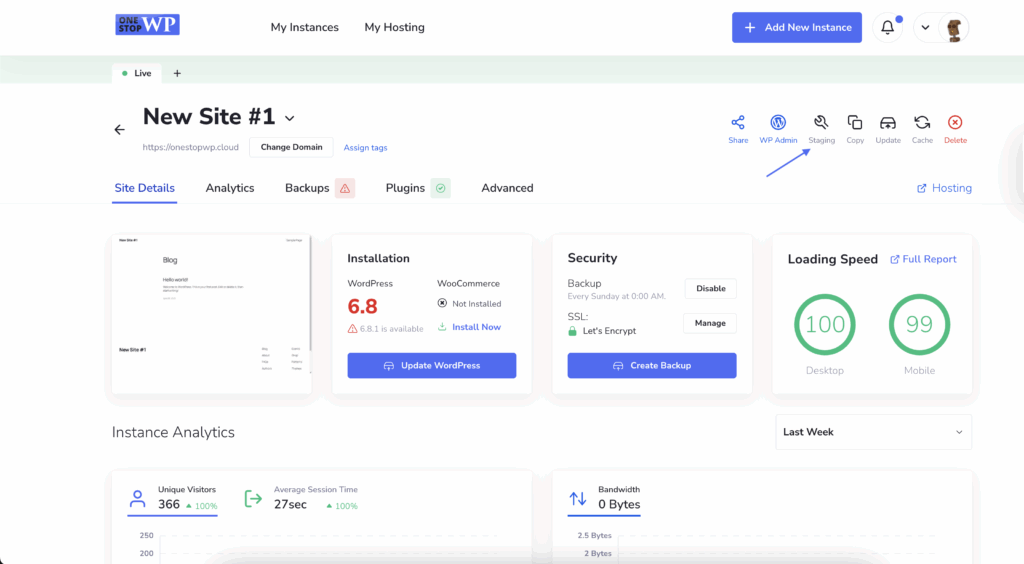
With OneStopWP this is easier than ever! This is done literally with one click! Access the Manage Site section and there you will see the Staging button:

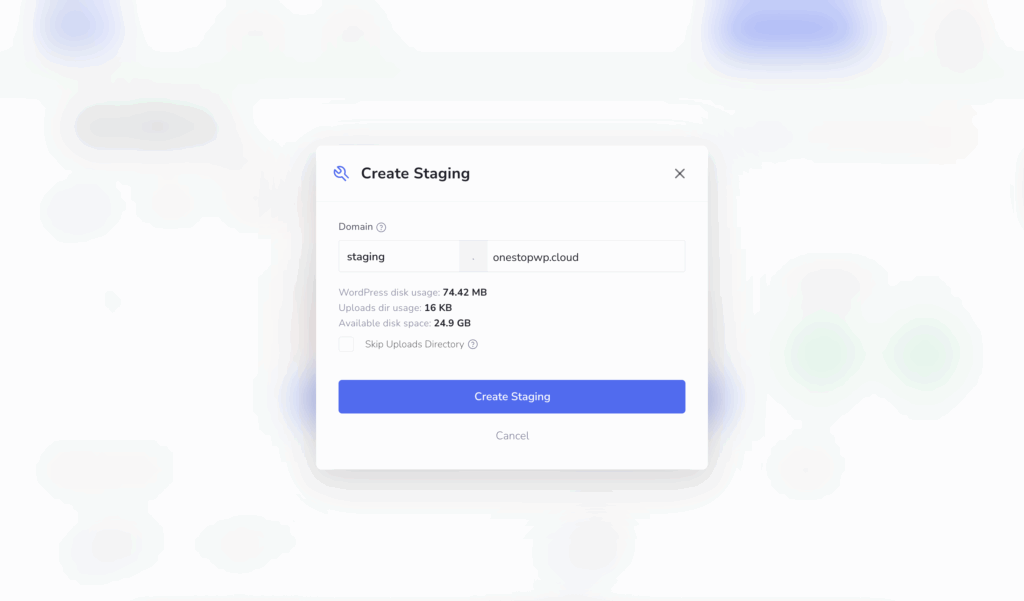
After this you will be prompted for your subdomain. If your domain name is fully routed via our Cloudflare DNS zone, the new subdomain will be automatically created. If the domain name is pointed only via A record (IP address), you will need to manually add the record in your registrar DNS zone.

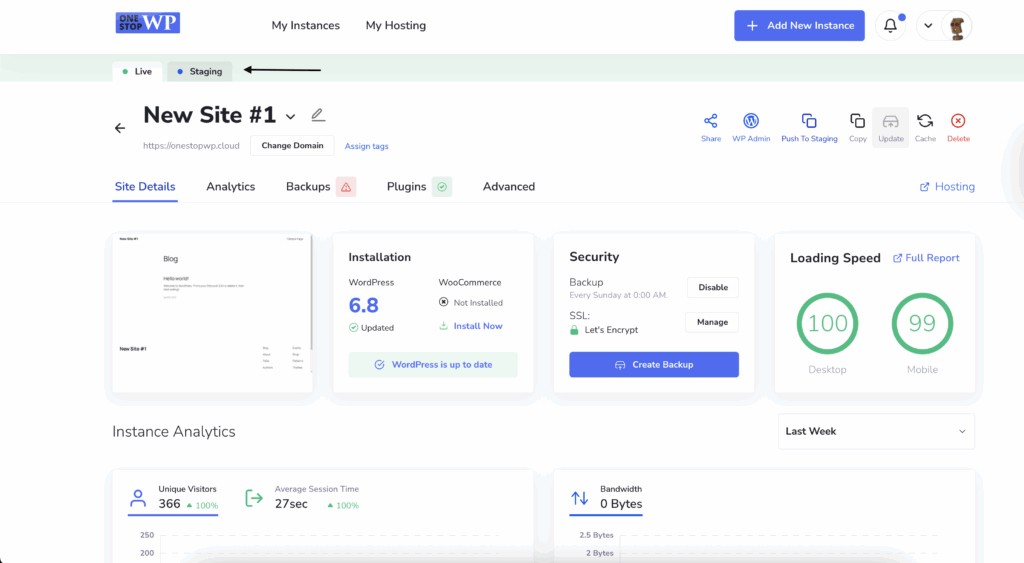
The only thing left is to click on the Create Staging button and give it a few minutes for the new site to be created! Once the staging WordPress site is created you will see it at the top menu and you can switch to it with one click:

After clicking you will switch to the newly created staging WordPress website and manage it in the same way as your live website!
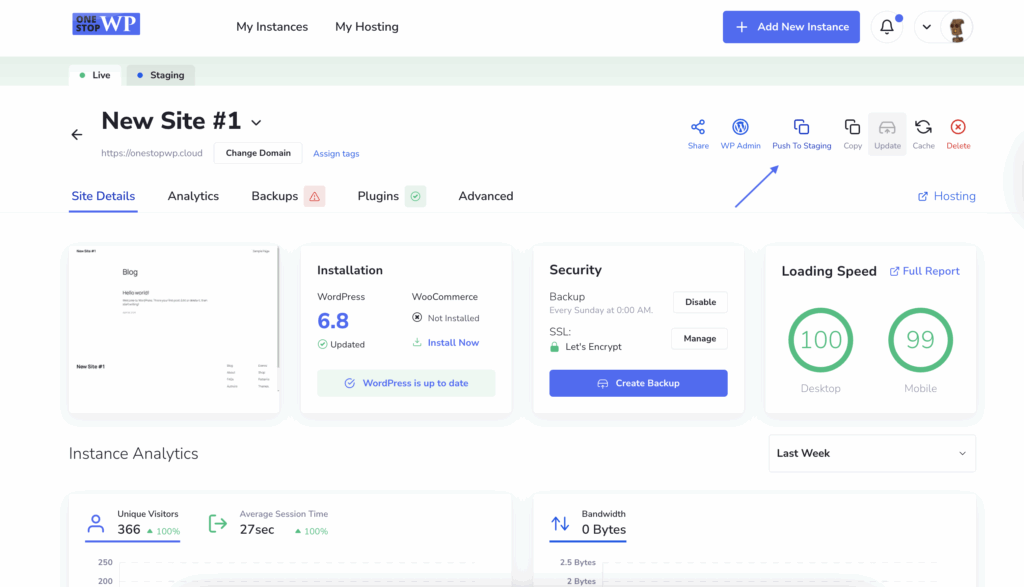
As you might notice now the Staging button is replaced with the Push To Staging button. If you want to push any changes done on the live website, you can easily do it by hitting this button:

And this is how you can easily create and maintain staging WordPress site!